Showing posts with label cookies. Show all posts

Tuesday, July 9, 2013

Gluten-free, Grain-free, Flourless Peanut Butter Chocolate Chip Cookies

About a month ago, I posted about the most amazing grain-free Chocolate Chip Cookies made with almond meal rather than the traditional flour. Well, today, I've got another one for you.


This cookie is made, not unlike the other, with nuts as the primary ingredient. This time, it's peanuts, or rather, peanut butter, that takes center stage. I've thrown in flax meal to further healthify this cookie and it works so well. It's undetectable in the final product. When baked, this mixture of peanut butter, sugar, eggs, and flax becomes a chewy, toothsome chocolate chip cookie that is out of this world. It's really magical what baking does to peanut butter.


This cookie is gluten-free. It's the most delicious peanut butter cookie I have ever had. The ingredients come together within minutes with no kitchen gadgets needed except a wooden spoon and a bowl.


Bake time is minimal, as well. Studded with chocolate chips, this cookie is a great alternative to traditional chocolate chip cookies for a fun, quick summer snack that you can feel good about eating or giving to your kids!


Peanut Butter Chocolate Chip Cookies
Recipe by: Leelabean

(Yield: about 30 2" cookies)

1 c peanut butter (not the natural kind)
1 large egg
1 large egg white
1/4 c flax meal
3/4 c granulated sugar
1 t vanilla
1/2 t baking soda
1/4 t salt
3/4 c mini chocolate chips (bittersweet or semisweet)

Preheat your oven to 350F. Line a cookie sheet with parchment paper.

In a bowl, combine the peanut butter, egg, and egg white. Add the flax meal and granulated sugar, followed by the vanilla and baking soda and salt. Mix well to combine. Fold in the mini chocolate chips.


Scoop spoonfuls of dough onto a parchment-lined cookie sheet and bake for 11-13 minutes or until the cookies puff up and they oh-so lightly begin to brown around the edges.


Take the cookie sheet out of the oven and let the cookies cool on the sheet for 10 minutes. Then transfer them to a cooling tray until they are completely cooled. Store the cookies in an airtight container for up to 1 week. This cookie will stay chewy and just get yummier as the days pass.


Enjoy!

Saturday, December 29, 2012

Basics: Pudding Cookies

The holidays are in full swing and so far this year, I've made close to 2000 cookies - for gifts, parties, and just because it's that time of the year. Cookie time.. it brings on an intense urge to bake none other than cookies, for some strange reason (possibly to please that jolly old man in red when he comes to deliver your goodies under the tree). You may think this is normal for me, since I'm always baking. But quite honestly, I personally don't bake too many cookies throughout the year. I am definitely more of a cake baker. So, I use the holidays to make up for the rest of the year and bake dozens and dozens of different types of cookies.


Using prepared ingredients in baking can be very useful at times, as in the case of pudding cookies. It's basically a cookie made with a packet of Jell-o Instant Pudding powder. These puddings prepared as directed on their packages always seem a bit plain-jane for my tastes. But throw them into cookie dough or cake batter and voila! They give your treats an added oomph, which is why you'll always find these little boxes of pudding mix in my pantry. My favorite flavors to add into my desserts thus far are Pistachio, Cheesecake, White Chocolate and of course, Vanilla and Chocolate.


The other day while perusing my favorite aisle of the grocery store, I found a seasonal variety of Jell-o Instant Pudding - Candy Cane! I picked up a box along with another seasonal flavor, Gingerbread - more on that in another post.


The cookies photographed here, my Wintry Minty Chocolate Chip Pudding Cookies, were inspired by Kraft's recipe for pudding cookies. These cookies use the below recipe with Candy Cane Jell-o Instant Pudding Mix along with Andes Mint Chips (1 cup) and semi-sweet chocolate chips (1/2 cup) as the add-ins. These are subtly minty and encompass the perfect textural qualities you want in a chocolate chip cookie - chewy on the inside with a thin crispy exterior. And because of the addition of the packet of pudding mix, these cookies stay chewy and moist for days!


You can make these cookies with any pudding flavor you like! I would suggest the Vanilla or White Chocolate flavor if you are going to be adding the mint chips to the dough. If you just want a traditional chocolate chip cookie, use the Vanilla Instant Pudding with regular semi-sweet chocolate chips. The variety of cookies you can bake are endless. Be creative - throw together different pudding flavors and add-ins and come up with your very own signature pudding cookie!


Basic Pudding Cookies
(inspired by kraftrecipes.com)

1 c unsalted butter, room temperature
3/4 packed light brown sugar
1 package Jell-o Instant Pudding Mix
2 eggs
1 t vanilla extract
2 c all-purpose flour
1 t baking soda
1 1/2 c add-ins (chocolate chips, nuts, chopped dried fruit, chopped candy bars, sprinkles, etc)

Preheat your oven to 350*F. Line a baking sheet with parchment or a Silpat.
In the bowl of an electric mixer, beat the butter and sugar until light and fluffy - about 2 minutes. Add the pudding mix until fully incorporated. Add the eggs, one at a time, and then the vanilla until they are well mixed into the batter.
In a separate bowl, whisk together the flour and baking soda. Slowly add this to the wet ingredients and mix until just incorporated, taking care not to over-mix. Remove the bowl from the mixer, add your add-ins and fold them into the cookie dough. Using a 2T cookie scoop, drop the dough onto the prepared cookie sheet roughly 2" apart. These cookies will spread in the oven, however, I like to press the dough down and flatten them a bit with my hands before I bake them.
Bake the cookies for 10-12 minutes, taking them out when the edges have browned. Let them sit on the cookie sheet for about 5 minutes and then transfer them to a cooling rack until they are cooled completely. These cookies will keep in an airtight container for 5 days. Enjoy!

Tuesday, December 18, 2012

Orange Chocolate Snowballs and the Cookie Craze

It's been a while since my last post and for good reason. Last week was spent baking around 1000 cookies for my dearest friends' and family's holiday gifts that I sent out at the end of last week. This year it took me ages to come up with the quartet of goodies I'd be sending, but finally it took shape and I made these four items:
1. Chocolate Mint Buttons - chocolate sugar cookies infused with mint, frosted with mint cookie icing, decorated in holiday colors.
2. Cranberry Orange White Chocolate Biscotti - a hit last year, I thought my friends would appreciate it popping up in their gift baskets again this year.
3. Holiday Marshmallows - homemade vanilla marshmallows in a red and white swirl for the season.
4. Molasses Spice Cookies - delicious, chewy, spicy cookies deepened in flavor with molasses and rolled in sugar.
Riding the cookie train, on Saturday evening I had a small cookie swap with a couple of friends. It was fun, the treats were delicious. I made two treats to partake in the swap - White Chocolate Mocha Cake Balls and Cinnamon Roll Cookies. I initially wanted my cake balls to taste like tiramisu, but the end product tasted more like a white chocolate mocha. These recipes will be posted as soon as I come up for air.
Something in the air gets us in a cookie mood come Christmastime. I can't help by run to my KitchenAid and start mixing up dough at least once a day to try a new recipe or bring back a tried and true holiday favorite.

 
This year was no different, because after a week full of baking cookies, I'd have thought I'd be sick of them by now, but not yet. Yesterday, I made another cookie - a delicious, delicate orange-scented nutty snowball studded with chocolate chips.


If you think snowball cookies are a bit on the bland or boring side, try this recipe. The orange and nuts and chips make for a burst of flavor in its one bite. I used walnuts and pecans, but you can use any combinations of toasted nuts, citrus zest, and chips that you desire.


Tossed in confectioners' sugar while still warm, they become little snow-covered gems of delight for the season.


Orange Chocolate Snowballs
(Recipe by Leelabean)

2 1/2 c flour
2 1/2 c confectioners' sugar, divided
1 1/4 t baking powder
1/2 t salt
2 sticks (1 c) unsalted butter, room temperature
1 egg
1 t vanilla extract
zest of 1 orange
3/4 c toasted nuts (I used walnuts & pecans)
3/4 c mini semi-sweet chocolate chips

In a mini-food processor, grind up the nuts until they resemble coarse meal. Set this aside. In a large bowl, combine the flour, ground nuts, baking powder, and salt and whisk together. In the bowl of a stand mixer, cream 1 1/2 c confectioners' sugar and butter until light and fluffy - about 2 minutes. Then add the egg, vanilla, and zest of an orange. Blend well. Slowly add the dry mixture to the wet ingredients and mix until just incorporated. Fold in the chocolate chips.
Wrap this dough in plastic wrap and store it in the fridge until cold and firm throughout (at least a couple of hours). This dough can be made up to 2 days ahead. When you are ready to bake, heat your oven to 375*F. Pinch off pieces of dough that are the size of about 2 teaspoons and roll into little balls. Place them on a parchment lined cookie sheet about 1 1/2" apart from each other. Bake them in the preheated oven for around 8 minutes. It could be a minute or two more or less depending on your own stove. They will turn the slightest light brown on the bottoms when they are ready. Let them cool on the cookie sheet for about 2 minutes.
In a small bowl, put in the reserved 1 c confectioners' sugar. In groups of 5 or so, toss the cookies in the confectioners' sugar until well coated and place back on the cookie sheet to fully cool. Store in an airtight container at room temperature for about a week. Make sure to put some of these out on a plate for Santa on Christmas Eve. :-)

Sunday, October 14, 2012

Basics: Chocolate Chip Cookies

Chocolate chip cookies are the cornerstone of American baking. Such a comfort food, it provides a sort of unadulterated pleasure that only a great chocolate chip cookie can serve up. There are so many types of chocolate chip cookies out there that we are more than familiar with, we've likely tasted the gamut. There's chewy, crispy, melt-in-your-mouth, cakey, to name a few.


I, like a lot of fellow chocolate chip cookie eaters out there, prefer the chewy interior paired with a slightly crispy exterior. Chew is a big factor in great cookies, in my opinion.


I found a pretty amazing recipe that I tweaked a bit to conform to my liking. The resulting cookie is a not-to-sweet base that is enhanced by its chocolate additions. I have realized that this is quite a factor in having a great tasting cookie - lessen the sweetness of the cookie itself and let the sweet additions do the talking. The cookie base is just a vehicle for these add-ins anyway. Also, while baking these cookies after letting them refrigerate in the fridge for at least 24 hours does bring about an awesome cookie, if you are highly impatient as I am, and need to bake these cookies asap, you can do so with a pretty amazing result. I only refrigerated half of my batch (the other half went in the freezer - who needs 30 chocolate chip cookies sitting on their counter??) for about two hours before I heard them calling my name. So, I preheated my oven and baked them and the 15 minutes it took for me to do that was trying enough on my patience. But, boy was it worth it.... However you eat these cookies - piping hot from the oven (I had to, of course), cooled to room temperature, dunked in milk or coffee, a day or two old, they are superb. The dark brown sugar in them really brings a deep caramelly flavor to the cookies and the nutmeg completes the chocolate chip cookie experience in a way I cannot describe in words. Tasting is believing, trust me. Just remember that a chocolate chip cookie is only as good as the quality of the additions you use, so try not to use your run-of-the-mill grocery store chocolate chips. This time around, I used chopped Dove chocolate bars (both dark and milk) and a handful of crushed Oreo cookies. When I say you need to make these, I am not kidding around. Do it. You won't be disappointed.


A note on the frozen 1/2 batch: I froze this batch without any add-ins because I couldn't decide what I wanted to use and didn't want the pressure of making that decision. So, when I'm ready to bake them, I'll bring the dough to room temperature, fold in whatever additions I feel like using and then bake off as normal.


My Favorite Chewy Chocolate Chip Cookie
(Inspired by and slightly adapted from BraveTart's Chewy Chocolate Chip Cookies)

Yield: just under 2 lb dough (without add-ins) or about 30 1.5oz cookies (with add-ins)

12.5 oz all purpose flour *(see note below)
8 oz unsalted butter, room temperature
6 oz dark brown sugar (don't use light brown sugar!)
3 oz white granulated sugar
1 t baking powder
1 t baking soda
3/4 t salt
1/4 t nutmeg, grated
1 T vanilla extract
1 egg + 1 egg yolk
6 oz chocolate (I used a combination of milk and dark chocolate)
10-15 Oreo cookies, crushed

In an electric mixer, mix the butter and sugars together until they come together in uniform consistency. This should take about 30-45 seconds. Do not "cream" the butter and sugars as you do not need that excess air in our cookies. Next, add in the baking powder, baking soda, salt, nutmeg, vanilla, and eggs. Mix well to bring together the dough, making sure to scrape down the sides of the bowl. Add the flour and pulse the mixer so as not to over-incorporate the flour and toughen the cookie. I like to take a spatula and mix by hand toward the end. Fold in any add-ins you wish to use. Divide the dough into two discs and wrap with parchment and plastic wrap. At this point, you can place the discs into a sealed plastic bag and freeze them for up to 6 months. Otherwise, refrigerate the dough for up to 24 hours. When you are ready to bake them, preheat your oven to 350F and set a rack in the middle position in the oven. Remove the dough from the fridge and pull off 1.5 oz portions, roll them into balls and place them on a parchment- or Silpat-lined cookie sheet. Press down on the cookie balls to flatten them a bit, while making sure to leave about 3" between each cookie as they will spread as they bake. Check the cookies after 10 minutes, making sure they are not baking too quickly. Then bake for an additional 2-3 minutes. The cookies are ready when they have set up around the edges with a lightly toasted color to them, while the center of the cookie still looks a bit soft and underdone. Take out the cookie sheet and let it rest on the counter until the cookies are fully cooled or throw caution to the wind and eat them hot! It may very well be worth the pain. Or be good and let them rest for 10 minutes. Then, eat them slowly and deliberately, enjoying every last bite. Enjoy!

*Note: If you don't own a kitchen scale, you should consider investing in one. They are fairly inexpensive (for around $20, you can find a good one). Baking is a science and measuring by weight is crucial to proper ratios and consequently, high quality baked goods.

Monday, June 18, 2012

Father's Day Cookies

I think I've said it before, my husband's favorite cookie is the black and white cookie. And it's fitting as he is a New Yorker, through and through. So for Father's Day after having baked a bunch of fancy desserts over the past few weeks, I thought I'd give him exactly what he wanted - a simple, no-frills cookie. The black and white cookie:


These cookies are truly perfect in their simplicity but it's crucial to get the textures right otherwise this will not end up a classic black and white cookie. The cookie part must be cakey and thick and the frosting must set to a slightly hardened finish resulting in a quite sturdy cookie for transporting. This is why I suggest making the cookies a day in advance.


I baked the cookies and iced them on Father's Day and my hubbie said the cookies were great except for one detail. The icing hadn't hardened to his liking. Although the icing had set, it was too soft, in other words, too fresh. These cookies are known for their deli presence which may suggest a less than fresh-out-of-the-oven texture especially with the icing. Therefore, for the ultimate deli-style black and white cookie experience, make the cookies and ice them a day in advance of serving. When you eat them the next day, the icind will have hardened quite nicely on the outside, with a soft chewiness underneath. You will not be disappointed, especially if you've ever had and loved a New York black and white cookie.

*(Be sure to like my Facebook page: www.facebook.com/Leelabean to stay up to date on the goings-on in my kitchen..!)*


Black & White Cookies
(Adapted and halved from America's Test Kitchen)
Makes around 12 large cookies

Cookies:
2 cups cake flour
1/4 t baking powder
1/4 t salt
8 T unsalted butter, room temperature
3/4 c sugar
1 large egg, room temperature
1 t vanilla extract
1/4 t lemon extract
1/2 c 2% milk

Icings:
2 T light corn syrup
1/4 c water
2 1/2 c confectioner's sugar (10x)
1/4 t vanilla extract
3 T cocoa powder
1 T vegetable oil

For the cookies:
Place two oven racks in the two middle positions and preheat your oven to 350F. Line two large cookie sheets with parchment paper and set them aside.
Whisk the flour, baking powder and salt together in a bowl. In the bowl of an electric mixer, cream the butter and sugar on medium-high until it is pale, light, and fluffy (about 2 - 3 minutes). Add the egg to the butter mixture along with the extracts. Mix until it is well combined. Then add about 1/3 of the flour mixture. Next, add 1/2 the milk and then repeat with the flour and milk until it is all incorporated into the dough. Be careful not to overmix the dough. At this point, you can cover the dough in plastic wrap and store in the fridge for up to 24 hours. Bring it to room temperature before you are ready to bake it.
Scoop 1/4 c mounds of the dough onto the cookie sheets about 2-3" apart. Smooth the top of the cookies with a moistened finger (either using water or nonstick spray). It's easiest to scoop the cookie mounds in whatever size you wish using a cookie scoop. I used a tablespoon sized cookie scoop and ended up with 2 1/2" cookies. Bake the cookies until the edges begin to turn golden brown, anywhere from 12 - 15 minutes, depending on your oven. Once out of the oven, let the cookies rest on the cookie sheets for about 10 minutes and then transfer them to a cooling rack until they are completely cooled.

For the icings:
Boil the corn syrup and water over medium high heat and then turn off the heat. Add the confectioner's sugar and vanilla extract and whisk until smooth and shiny. Divide the icing in half. Set one half (vanilla icing) aside. In a small bowl, combine the cocoa powder and vegetable oil and whisk until uniform in consistency. Add the cocoa paste to the other half of the icing and whisk in until smooth and completely combined. You may add a few drops of water to the chocolate icing to loosen it up to a spreadable consistency. Using an offset spatula, spread the chocolate icing on half of each cookie. Let the cookies set for at least 15 minutes. Again, using an offset spatula, spread the vanilla icing on the other half of each cookie. Let dry for another 15 minutes. Store in an airtight container. These cookies keep for about 3 days at room temperature.

Sunday, June 10, 2012

Homemade Oreos

Here is a case of homemade being way better than storebought. There have been quite a few recipes going around the internet for homemade oreos and I'd always had it on my list (my, how long this list is!) to make them. What better time than at the end of school for the kids' teachers' gifts..?


I have a friend who gets Oreo's straight from the manufacturer from time to time and she says that she's madly in love with these particular packages because the cookies are actually soft. They only seem to harden with time as the sit on the shelves in our grocery stores. Well guess what, these homemade cookies are soft too! They are soft but firm enough to sandwich the thick cream between two of them. They are quite chocolatey without being heavy - maybe not such a good thing, as it's easy to pop 2 or 5 or 7 in one sitting...


So, I pulled up the recipe and got to work. It didn't take long and wasn't difficult at all! The cookies are a cinch to throw together and the cream filling tastes JUST like the real thing.
It's a fun project and kids, young and old, will thank you for them. Just make sure you save this recipe, because if you make them once, you are going to want to make them again... and again.


Homemade Oreos
(Slightly adapted from Retro Desserts: Totally Hip, Updated Classic Desserts from the '40s, '50s, '60s, and '70s, Wayne Harley Brachman)

Cookie:
1 1/4 c all purpose flour
1/2 cup cocoa powder (Dutch processed or regular works)
1 t baking soda
1/4 t baking powder
1/4 t salt
1 c granulated sugar
1 1/4 sticks (10 T) unsalted butter, room temperature
1 large egg, room temperature

Cream Filling:
1/2 stick (4 T) unsalted butter, room temperature
1/4 c (4 T) vegetable shortening
2 cups confectioner's sugar
2 t vanilla extract

Preheat your oven to 350F with the rack in the center of your oven. Line a baking sheet with parchment. In a bowl, mix the flour, cocoa, baking soda, baking powder, salt and sugar. Beat in the butter and then the egg until it forms a consistent dough.
Scoop rounded teaspoonfuls of dough onto the prepared baking sheet about 2" apart. Use a flat-bottomed cup sprayed with nonstick spray to flatten each of the cookies. Bake the cookies for 9 minutes (they may not look or feel done, but they will set quite a bit as they are cooling).
On to the cream filling! With an electric mixer, beat together the butter and shortening until well combined. Then add the confectioner's sugar slowly and mix on medium until thoroughly blended. Add the vanilla to incorporate. Spoon this filling into a piping bag fitted with a medium round tip such as a Wilton #12.
Once the cookies have completely cooled, pipe a teaspoon-sized bit of filling in the center of half of the cookies. Sandwich with a cream-free half and press down gently and evenly to spread the filling.
Voila! Homemade Oreos! Be a rock star at your next gettogether or party and make these! They are entirely customizable. You can make them oversized or mini and even change the color of the filling or add sprinkles to it for the extra fun factor..!

Tuesday, May 22, 2012

Jewelry Cookies


Jewelry parties are all the rage these days. I know so many people who are hosting them. I'd consider it if I wore costume jewelry on a regular basis, but I'm one of those people who consider this too much work. I've got a few simple pieces that make up my pretty basic ensemble for most every day. My sister-in-law who is a big fan of costume jewelry and all things beautiful and glamorous hosted one of these parties and asked me to make her some jewelry cookie favors. These necklace pendant cookies were sugar cookies with some pizzazz. Wear your jewelry and eat it too... I like the concept. 


Sunday, April 29, 2012

Planning a Week of Baking

I find that most tasks in life are much simpler approached with a schedule. Producing multiple orders due within days of each other, raising two kids, and running a household warrants me to create a multitude of lists, each one coordinating, overlapping, and working towards the greater goal. The first thing I do when I encounter such a week is plan. This is the key to my sanity and so far it's served me well. Additionally, I don't sleep past the few hours my body truly needs for sleep and that helps a great deal too.
This week I had a couple of cakes, a dozen cupcakes, and over 50 decorated sugar cookie favors to make. The preparation of these cakes and cookies are broken down so I only do a few tasks a day spread out over a week, leaving the cake baking until the very end, since I like to have my cakes super fresh.


Thursday happened to be "Bring Your Child to Work Day," so my daughter was my sous chef for the day! Unfortunately, it's not all baking fun in a day in the life of me, so she assisted in folding and putting away a whopping four loads of laundry as well!


In dealing with fondant cakes, the preparations of the fondant and other decorations must be done days in advance to be ready to apply to the cake. One of my cakes for this week was a horse-themed cake for a little girl, Ella's, 6th birthday party. Everything I make for my baked goods is from scratch, so I prepared the fondant, horse applique, and daisies early in the week so they could set and dry. The cake was classic vanilla with chocolate buttercream. I created a bunch of daisy cookie favors for this order, too. Happy Birthday, Ella! I hope you have a fun and wonderful day!


My next order was for a communion. It consisted of a cake and cupcakes. The cake was a coconut cake filled with a pecan coconut filling similar to one you'd find in a German Chocolate Cake. It was frosted in a smooth white chocolate Swiss meringue buttercream. The design was a rose theme to coordinate with rose cupcakes which were chocolate cake with vanilla-flavored American buttercream.


My last order was for some smiley face and ticket cookies.


I know I've said this before, but as intense as these weeks prove to be, I really enjoy being in the midst of them - the planning, the preparation, the execution. I love it.

Thursday, December 22, 2011

Cookie Swap Recipe: Dulce de Leche Sandwich Cookies

I'd have to say the crowning achievement of my cookie swap selection had to be this last cookie I am bringing to you. It's two dulce de leche cookies with a slather of creamy dulce de leche in between. Dulce de leche is similar to caramel. Where caramel is a concentrated sugar-water solution, dulce de leche is a concentrated sugar-milk solution. The result is a creamier more flavorful caramel that is the perfect accompaniment to most anything - cookies, cakes, fruit, a spoon.... Moreover, it's a complete cinch to pull together. Buy yourself a can of sweetened condensed milk. Open it. Pour it into an oven-safe casserole dish. Cover it tightly with aluminum foil. Set your oven to 425F. Put the condensed milk casserole dish into a larger, deeper oven-proof pan and fill this outer pan 1/2 way up the side of the smaller casserole with boiling water. Please be careful doing this. I usually pull out the rack in my oven half-way and put everything together there and then just slide in the rack when it's ready to bake.
Bake this for 1 1/2 to 2 hours. Replenish the water as necessary, keeping the level half-way up the side of the smaller dish. You will see the condensed milk become a caramel color. This is dulce de leche! It's that simple. Take out the dulce de leche and whisk fairly vigorously so as not to have a lumpy sauce. Let it cool completely and it can be stored in the refrigerator for up to one week. Alternately, you can purchase dulce de leche at your grocery store.
The dulce de leche sandwich cookies are one of the many things you can make with your dulce de leche. The cookie is fabulous on its own, but sprinkle a little sea salt before sandwiching each cookie and this cookie goes from fabulous to out of this world!


Dulce de Leche Sandwich Cookies
(Recipe from Baking: From My Home to Yours, Dorie Greenspan)

Ingredients:
2 1/2 c all-purpose flour
1 t baking soda
1/4 t salt
2 sticks (8 ounces) unsalted butter, room temperature
3/4 c dulce de leche, plus more for filling
3/4 c packed light brown sugar
1/2 c sugar
2 large eggs

Directions:
Preheat oven to 350oF and position a rack in the upper third of the oven. Line two baking sheets with parchment paper and set aside. In a medium bowl, whisk together the flour, baking soda and salt.
In the bowl of a stand mixer fit with a paddle attachment, beat the butter at medium speed until just softened and broken up a bit. Add the 3/4 c dulce de leche, brown sugar and granulated sugar. Beat on medium speed until light and fluffy, about 3 minutes. Add the eggs one at a time, beating to incorporate.
Reduce the mixer speed to low and add the dry ingredients all at once. Mix only until the flour is just incorporated. You may need to finish off the mixing with a big spatula.
Spoon the dough onto the lined baking sheets using a heaping teaspoon of dough for each cookie. The dough will be soft and this might be a bit messy. Leave 2 inches of space between each cookie.
Bake the cookies for 10 to 12 minutes. The cookies will be honey brown with a light crust, but still very soft when they come out of the oven. Let them rest on the cookie sheet for a minute or two before removing to cool.
Once the cookies are cooled completely, spread them with dulce de leche. You may sprinkle with sea salt (optional). Sandwich the cookies. Keep well wrapped for up to four days.

*How to make Dulce de Leche:

Set your oven to 425oF. Empty the contents of a can of condensed milk into an oven-proof casserole dish and cover tightly with aluminum foil. Place this dish within a larger dish with raised sides and fill the larger dish with water at least 1/2-way up the sides of the dish with condensed milk, providing a water bath for the condensed milk. Put this into the oven and bake for 1 1/2 to 2 hours. Replenish the water as necessary. When you take out the dulce de leche (remember, it will be very hot so be careful, especially when pulling the foil off!), whisk it for a few minutes until it becomes smooth. This may be stored in the fridge for up to 1 week.

Thursday, December 15, 2011

Cookie Swap Recipe: Rugelach

Hey everybody. So, you'll remember a few days ago I posted about my Cranberry White Chocolate Biscotti from my Cookie Swap last week. Well, here's the second cookie I baked for this fun party.
Looking for a nut-free Christmas cookie, or rather 3, was quite a challenge. Many of you well know that most cookies, especially around this time of year have some sort of nut component in them. But I wanted all my guests (including my nut-allergy ones) to be able to try all the cookies, so that was one of the rules that I made sure I put forth.
After poring through many cookbooks, I decided upon rugelach. Rugelach is a traditional Jewish cookie. It's got a flaky cream cheese based crust and its filling is usually some combination of cinnamon, nuts, chocolate, raisins and fruit preserves.
I made them omitting the nuts and with a chocolate, cinnamon and apricot preserve filling. I think they came out quite well and were a delicious addition to my cookie swap table.


Rugelach
(from the pages of Baking Illustrated)

Dough
2 1/2 c AP flour
1 1/2 T sugar
1/4 t salt
16 T unsalted butter, cut and chilled
8 oz cc, cut and chilled
2 T sour cream

Filling
1 c sugar
1 T ground cinnamon
2/3 c apricot preserves, processed smooth
1 c dark chocolate, chopped finely

Glaze
2 lg egg yolks
2 T milk

For the Dough-
Combine the flour, sugar in the bowl of your stand mixer or food processor. A food processor works better, but either will do the job well. Add the butter, cream cheese, and sour cream and carefully combine until the dough becomes crumbly – the size of cottage cheese. Do not over-mix this dough. If you do, it will not be flaky and pastry-like once baked. Place the dough on a clean counter space divide it into 4 equal portions. Press each one into a disk and then, using wax paper to sandwich the dough, roll it out to a rectangle about 9” long x 6” wide or until the dough is about 1/8” thick. Place in the freezer for 30 min. Alternately, you can make this dough ahead of time and store it in the freezer, tightly wrapped, at this stage until you need to make the cookies. The dough can be frozen at this point for up to a month.
For the Filling-
Combine the sugar and cinnamon. Remove the dough from the freezer and spread 2 T preserves, 1/4 c chopped dark chocolate, and 2 T cinnamon sugar over the top of the dough. Roll tightly into a log and slice ½” pieces. Place them 2" apart on parchment-lined cookie sheets. Freeze for 15 minutes. While the cookies are in the freezer, heat your oven to 375F.
Whisk the glaze ingredients. Take the cookies out of the freezer and brush them with the glaze. Bake the cookies until they start to brown on the edges and have puffed up a bit., about 20-21 minutes. Let the cookies cool.
This recipe makes about 35 cookies. These cookies may be stored at room temperature for up to 5 days or frozen for up to a month.

Monday, December 12, 2011

Cookie Swap 2011

This year I decided to host a cookie swap. With just a few friends, it would be an intimate affair that we all needed - a respite from the harriedness of this time of the year. Preparation for this party was the hurdle though, having set a 3 cookie requirement and eliminating the use of tree nuts in these cookies. This party was my idea of fun - sitting around the table, eating sweet treats, and discussing baking! The cookies my lovely friends brought were amazing and quite varied and so much fun to taste and evaluate. I cannot wait for next year's swap.

The cookie I made is a Cranberry White Chocolate Biscotti. It's flavored with orange zest and this combination - white chocolate, cranberries, and orange - is really amazing. If you haven't tried it already, you must. The smells wafting from my oven while baking this cookie are truly bakery-worthy. The biscotti is perfect with a hot cup of coffee, tea, hot chocolate or any other warm drink you prefer. It's utterly dunkable - becoming soft and losing their crunch while retaining their structure, the white chocolate drizzle starting to melt slightly, as it absorbs just the right amount of liquid from your hot and cozy drink... mmmmmm.. cookie heaven.


Thursday, December 8, 2011

Christmas Cookie Blunders

Christmas cookies have become a tradition in our house almost as important as putting up the tree and decorating it. The kids are excited to hear which cookies I've picked each year as the stars of our Christmas cookie lineup and even more so to sample them and have them easily accessible for the few weeks before this joyous holiday.
One of our favorite cookies are snowballs. They are melt-in-your-mouth little domes of sugary bliss. With ground nuts blended in, they are more commonly known as mexican wedding cakes. The powdered sugar incorporated into this dough makes them so delicate that they do indeed literally melt in your mouth. I think we all prefer the nutty versions of these cookies - as we prefer the nuttier versions of most everything (not limited to edible things)... :-) You can really use whatever nut you desire. My favorites are hazelnuts and almonds but pecans, walnuts, and pistachios would do well too.
One evening this week, my son, unaware of my excessively long list of things to do, requested homemade cookies. I couldn't turn him down because well, who in their right mind could turn down cookies? We were feeling the holiday spirit and Christmas isn't Christmas without cookies....! I asked him if he wanted snowballs and he eagerly said yes. After searching high and low for my recipe and not having any luck I decided to throw together the ingredients from memory and cross my fingers.

As you can plainly see from the picture above, the result was NOT a snowball nor a mexican wedding cake. The cookies spread in the oven causing them to look more like a traditional sugar cookie than anything else. Of course this is in part because I forgot to refrigerate the dough before throwing the cookies into the oven. In my defense, I was trying to make these cookies while figuring out what I was going to prepare for dinner, so I was a bit distracted. Nevertheless, the cookies spread and when I pulled them out and took a bite, I was pleasantly surprised by the result. The cookie was a crispy-on-the-outside, chewy-on-the-inside nutty sugary cookie that was quite delightful! To make sure I was not imagining it, I let the kids taste them. Though they were disappointed they didn't get the cute little powdered sugar-coated snowball shapes that they are so accustomed to at this time of year, they loved them and their samples disappeared before I could say "Time for dinner!" A happy accident! I was so pleased with this cookie that I have decided to share the recipe with all of you. In fact, I've added it to my cookie aresenal and I am excited to try it again with different nuts.


Leelabean's Nutty Snow Flurry Cookies

1/2 cup nuts, ground - pistachios, walnuts, hazelnuts, pecans, almonds (I used almonds, here)
1 cup confectioner's sugar
1 cup all-purpose flour
pinch of salt
1 stick unsalted butter, room temperature
1 tsp vanilla extract
more confectioner's sugar (for dusting)

Whisk together the ground nuts, confectioner's sugar, flour and salt in a bowl. Using an electric mixer, beat the butter and vanilla extract together until light. Slowly incorporated the flour/nut mixture until just combined. Roll into 1" balls and space evenly 2" apart on a greased cookie sheet. Bake for 12 - 15 minutes or until the edges start to lightly brown. Let the cookies rest for about 10 minutes on your counter. Dust the cookies with more confectioner's sugar and enjoy. This recipe makes 16 - 20 cookies.

The Traveling Cookie

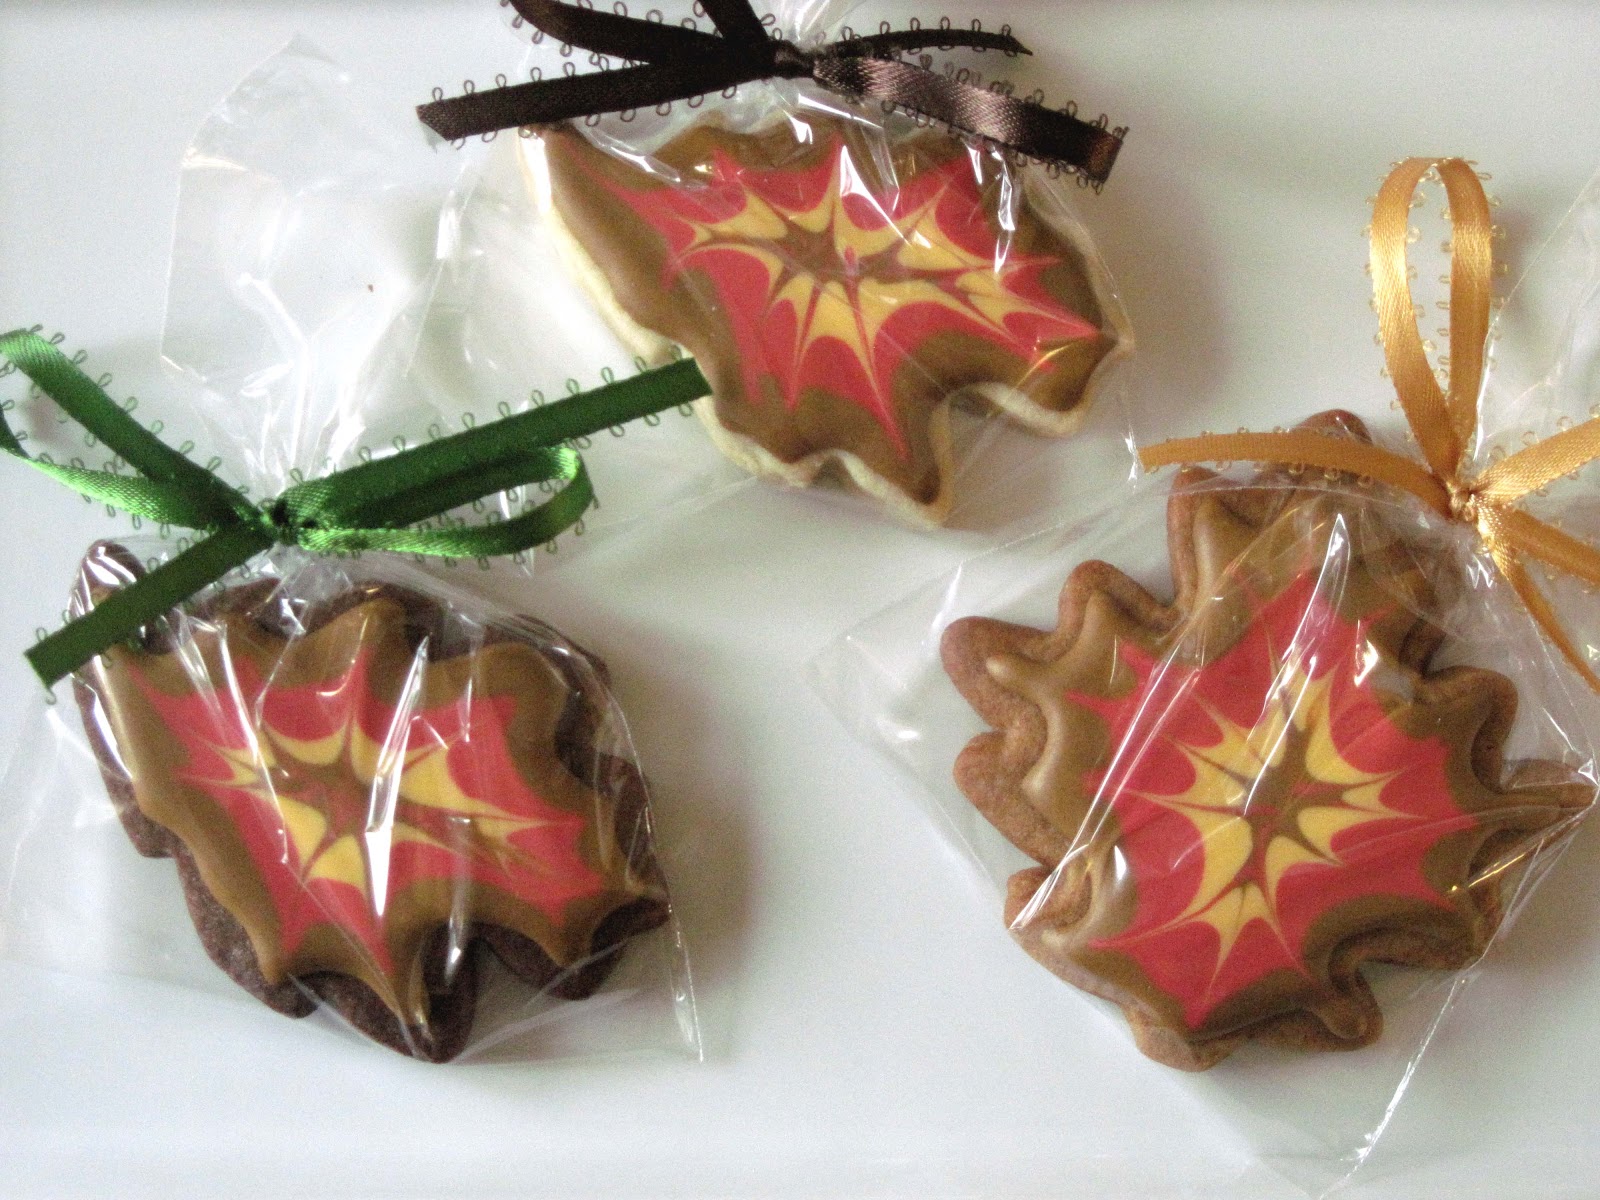
Last month I did something I'd never done before. I shipped my sugar cookies cross-country. My aunt had requested a bunch of Thanksgiving/Fall-inspired cookies to give to her friends for the holidays. I was excited to do the job, but wary of the potential result - cookies ending up on her doorstep in pieces...
But where there is a will, there's a way. So, I baked my cookies in three flavors - vanilla, chocolate, and gingerbread - and then wrapped them in cellophane bags. I purchased foam sheets, boxes, tissue paper, bubble wrap and peanuts. Overkill? Possibly.


I wrapped everything up in a box and must have written FRAGILE - FOOD ITEMS on the box about 20 times. I said a prayer and shipped them off. After what seemed like forever (2 1/2 days), my aunt informed me that the cookies arrived and not a single one had broken! Imagine my relief!
I had read online that sugar cookies with royal icing were sturdy for shipping, but I don't use royal icing for my cookies (my icing tastes better and is not as rock hard - it's a secret recipe). Well, seeing is believing and now I feel confident enough to ship my sugar cookies anywhere and have them arrive in one beautiful piece!