Thursday, December 8, 2011

The Traveling Cookie

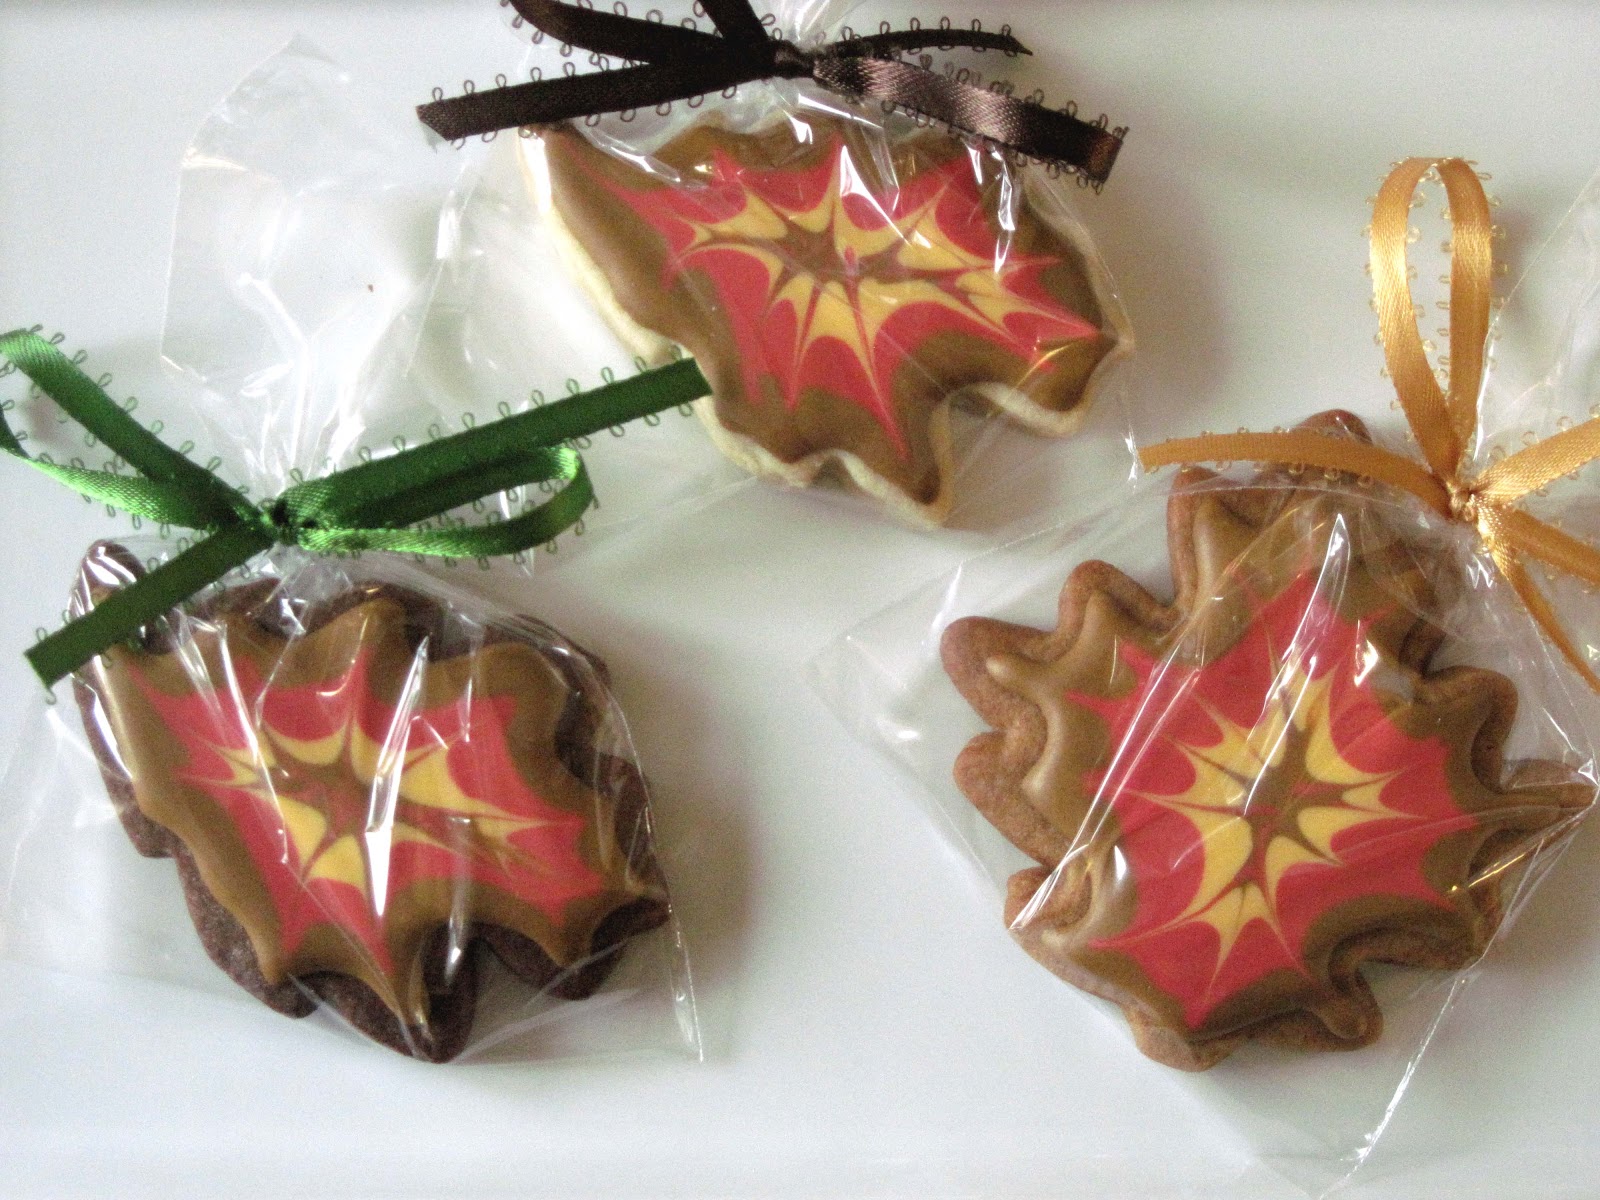
Last month I did something I'd never done before. I shipped my sugar cookies cross-country. My aunt had requested a bunch of Thanksgiving/Fall-inspired cookies to give to her friends for the holidays. I was excited to do the job, but wary of the potential result - cookies ending up on her doorstep in pieces...
But where there is a will, there's a way. So, I baked my cookies in three flavors - vanilla, chocolate, and gingerbread - and then wrapped them in cellophane bags. I purchased foam sheets, boxes, tissue paper, bubble wrap and peanuts. Overkill? Possibly.


I wrapped everything up in a box and must have written FRAGILE - FOOD ITEMS on the box about 20 times. I said a prayer and shipped them off. After what seemed like forever (2 1/2 days), my aunt informed me that the cookies arrived and not a single one had broken! Imagine my relief!
I had read online that sugar cookies with royal icing were sturdy for shipping, but I don't use royal icing for my cookies (my icing tastes better and is not as rock hard - it's a secret recipe). Well, seeing is believing and now I feel confident enough to ship my sugar cookies anywhere and have them arrive in one beautiful piece!

Monday, November 28, 2011

Thanksgiving

This year we had Thanksgiving at our house. It was low-key but special and completely enjoyable with the kids parttaking in the preparation of Thanksgiving dinner. It was the first year I truly felt like they were involved and sharing in the true meaning of the celebration.
We roasted a turkey and all the trimmings - sausage sage stuffing, roasted veggies, garlic mashed potatoes, sweet potato casserole, cranberry sauce, apple cider gravy and a dish of "plain jane" green beans, specifically requested by the kids. For dessert we had a Nutella cheesecake with an almond crust and pecan & walnut bars rather than the usual pies.
To start the day, I made a batch of apple cider donuts. I'd just purchased a donut pan and wanted to try baking donuts - something I'd never done before. They were easy to throw together for breakfast and ended up being a delicious start to the most wonderful day of the year (in my opinion), especially with a steaming hot cup of coffee or hot chocolate (topped with whipped cream, of course)! Go over to The City Sisters blog to get the recipe that I used. This version is a healthy swap-out to the usual fried donut.
I dipped some of mine in cinnamon sugar, some in a maple glaze, and others in a maple glaze with crumbled bacon on top. The sweet and salty combination was my personal favorite.


Happy Thanksgiving...!

Thursday, November 17, 2011

More Fall Baking

A couple of weeks ago, I got a bunch of persimmons from my friend. Her aunts grow them out in California and they had both shipped her some so she had some extra persimmons that she so generously gave to me. Of course, the first thing that came to my mind was how to bake with them. I've heard that persimmons are just like any other fruit when it comes to baking. You can make delicious breads and muffins with them. Their flavor is mild but pairs very well with the same spices you would use with pumpkins - cinnamon, nutmeg, gloves, ginger. One thing when baking with persimmons is that the fruit needs to be overripe, mushy even, to get the sweetest, most pleasing taste in your baking.


So, I baked a batch of persimmon cupcakes. I had some leftover maple buttercream from my son's birthday party that I thought would be the perfect topping to this fall treat. And it was. The result was a pleasant, fall-inspired dessert with tropical undertones. If you love persimmons, you will enjoy this cupcake. It's the perfect way to get your kids to try new fruit. These cupcakes needn't be covered in frosting - they are just perfect by themselves with a cup of coffee in the morning.


Persimmon Muffins

1 3/4 cups All Purpose flour
1 1/4 t pumpkin pie spice
1/2 t salt
1 t baking soda
1 T canola oil
8 T unsalted butter, room temperature
1/2 c packed light brown sugar
1/2 c granulated white sugar
2 large eggs, room temperature
1 cup persimmon pulp (about 3 persimmons)
1/4 cup buttermilk
1/4 cup mango juice

Preheat your oven to 350F. Whisk all your dry ingredients together (flour, spices, salt, baking soda). In the bowl of a stand mixer, beat the butter, sugars, and oil for a couple of minutes until light and fluffy. Add in the eggs one at a time, followed by the persimmon pulp, buttermilk and mango juice. Slowly add your dry ingredients and mix only until combined. Place liners in a cupcake pan and fill them with the batter 2/3 of the way up the liners.
Bake the muffins for 25 to 30 minutes until golden brown on the top and a toothpick inserted in the middle of a muffin comes out clean. Cool on a rack and then enjoy!

Tuesday, November 8, 2011

Conquering Fears!

Last week was my son's 4th birthday party. If you know my son, you'll know that he's obsessively into sharks. He has about 500 shark toys, is constantly drawing sharks, and his favorite things to watch on TV are episodes from the famous "Shark Week." His favorites types of sharks are the great white and the megaladon. For those of you who are not aware, a megaladon is the largest prehistoric shark.
Naturally, when I started planning this party, I knew that sharks would have to be the theme.
Now, if you know me, you'll know that I have quite an intense phobia of sharks. I can usually handle seeing sharks with their mouths closed but when they're grinning and baring all I scream and hide. It's pretty pathetic, I know, but it's always been this way. Face your fears gets taken to a whole other level when you end up with a son who takes out 10 shark books from the library at a time, each one containing grizzlier pictures than the previous one. I have to constantly be on guard throughout my house for fear of finding one of these books or toys staring me in the face.
This posed a bit of a problem when I was sketching out the birthday cake. I wanted a giant shark coming out of the water head first with his mouth wide open. How was I going to do this? Surely I'd need a point of reference.. I ended up using a foot-and-a-half long rubber shark toy that I've grown, after quite a few months of mental training, used to looking at. Its features are just a tad off, so it's menace factor is not as bad as it could be. For specifics such as eye location and positioning of the teeth, I asked my husband to refer to pictures of real sharks and report back to me. I must say it worked out. We're a good team. :-)


An exciting bit about this cake was that it was the first cake where I've attempted to use rice crispie treats to mold the decorative part. The shark was entirely molded from these treats, frosted in buttercream and then thickly layered with homemade fondant. Working with these treats proved to be a fun experience and one I will definitely tackle again!


My son's party was a blast. It was my favorite kind of party - an intimate affair - with family and close family friends. There were shark games, shark bites, and we even gave away shark bait as prizes! After having spent hours designing and creating my son's birthday cake, something happened to me that never has before. I became quite attached to my shark creation atop the cake. I couldn't bear to let the kids take it apart to sample, much to their disappointment. After the party, I carefully wrapped it up and put it away in my fridge where it safely sits, still today. I've no plans of getting rid of it anytime soon... Every day, I peek in and stare lovingly at my fearless creation. :-)


Happy Birthday, Honey Pie!

Wednesday, November 2, 2011

Birthday Cinnamon Rolls

Birthdays are probably the single most exciting day in a child's life each year. I am a huge believer in setting traditions for my family. It allows us to recall precious memories of those special days in our lives and gives home a sense of comfort and reliability in an otherwise chaotic, unsure world.
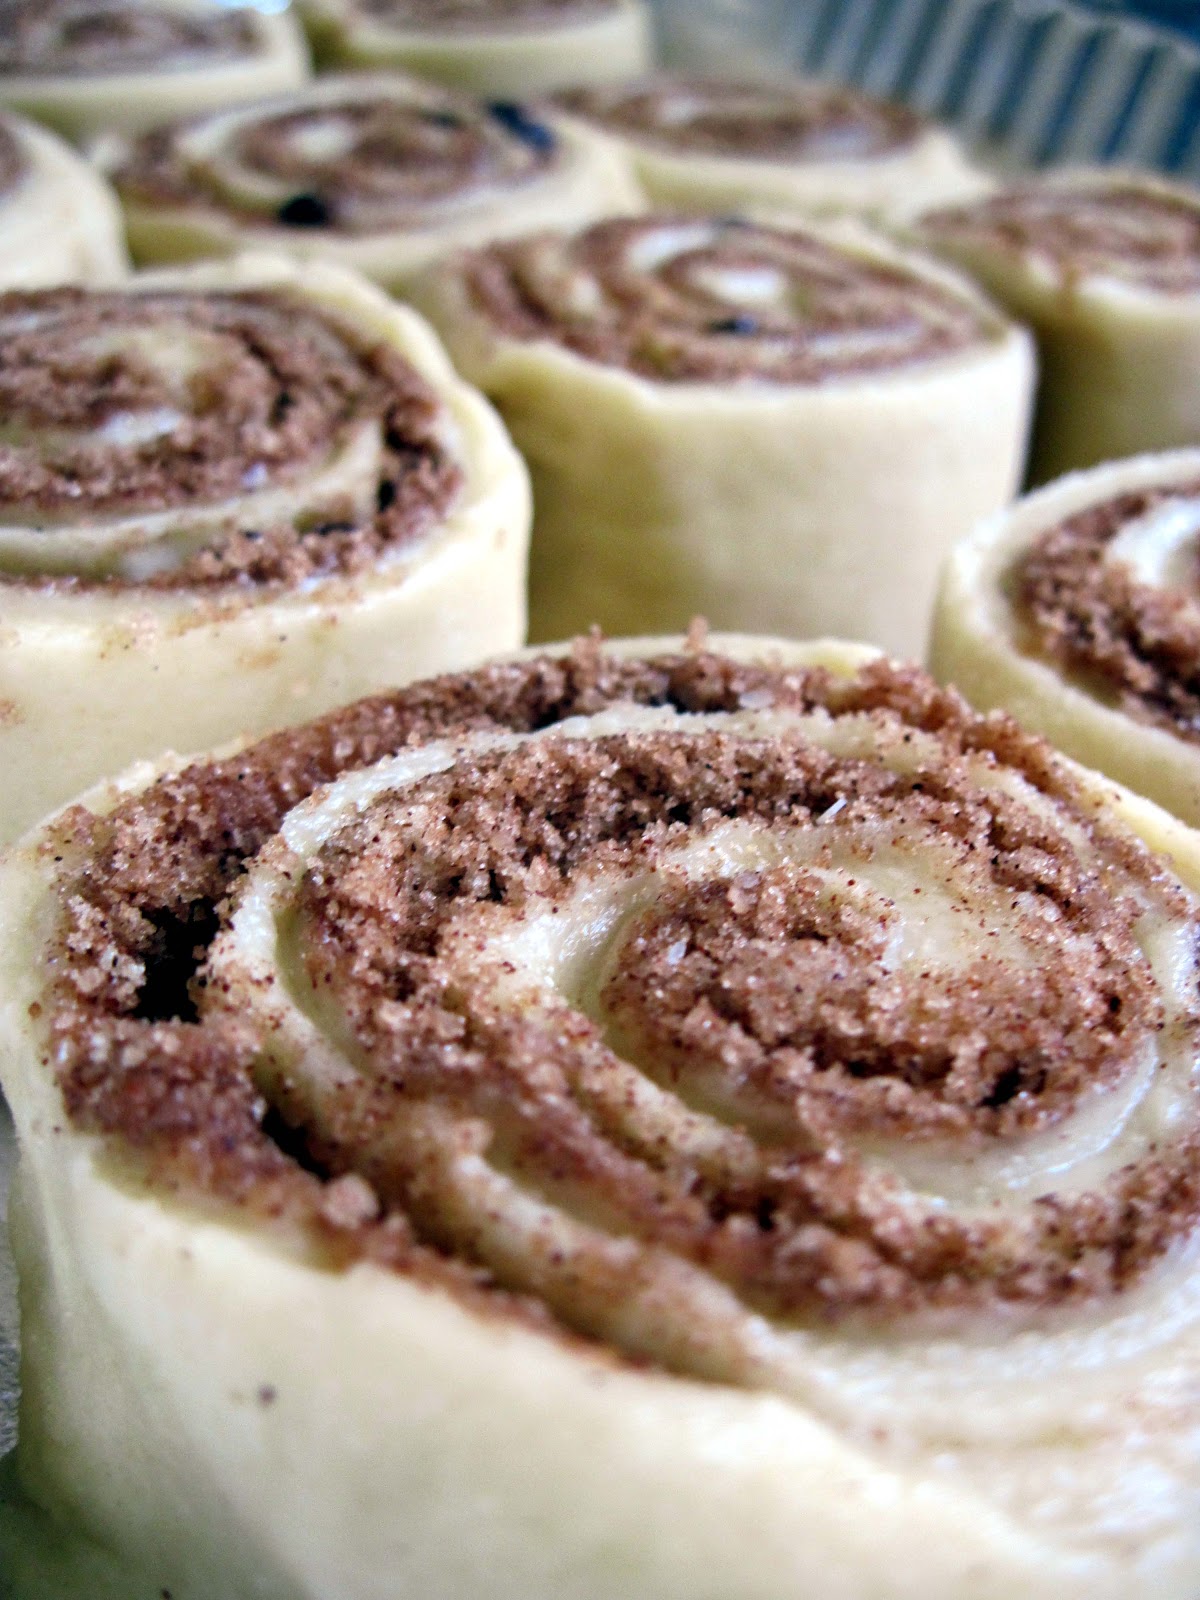
This week was my son's 4th birthday! Over the past couple of years, I've been making cinnamon rolls (one of my kids' favorites) on birthday mornings for breakfast. It's become a nice tradition, though I wasn't able to find the perfect recipe. The recipe below, however, is a keeper. The rolls are big and fluffy and not overly sweet. The tart cream cheese icing is the ideal compliment.


Now my kids know to expect birthday cinnamon rolls on that one very special day every year. For a family of four, four days of cinnamon rolls per year is perfect, because, well... let's just say they're not the most healthy breakfast option. :-)

If you are using yeast for the first time, don't be afraid. There are two key rules to follow: 1. Make sure the liquid you are adding your yeast to is between 110F and 120F. Don't guess! Use a thermometer. 2. Make sure the date on your yeast has not expired. Yeast is finicky and you need fresh yeast to produce a rise. Follow the recipe below as written and you will have delicious homemade cinnamon rolls that you can thank me for later... :-)


Cinnamon Rolls
(Slightly adapted from: Tracey's Culinary Adventures which was adapted from the TV show, Cooks Country)

Dough:
3/4 cup milk (110F - 120F)
2 1/4 t instant yeast
3 large eggs, RT
4 1/4 cups all-purpose flour
1/2 cup cornstarch
1/2 cup sugar
1 1/2 t salt
12 T unsalted butter, RT & cut into small chunks

Cinnamon Filling:
1 1/2 cups packed light brown sugar
1 1/2 T cinnamon
1/4 t salt
4 T unsalted butter, RT

Cream Cheese Frosting:
4 oz cream cheese, RT
1 T milk
1 t vanilla extract
1 1/2 cups confectioners' sugar (10x)

Heat your oven to 200F and then turn it off. Line a 13x9" pan with foil and spray it with cooking spray.
Add the yeast to the warm milk and whisk. The yeast will start to foam. Add the eggs and blend together. In the bowl of a stand mixer fitted with the dough hook, add the flour, cornstarch, sugar, and salt. While the mixer is on low, drizzle the milk-yeast-egg mixture in until the dough begins to come together. Add the chunks of butter one at a time as you increase the speed of the mixer to medium. Knead this dough for about 10 minutes. A sign that the dough is well kneaded is when the dough looks smooth and doesn't stick to the side of the bowl. Once this happens, take out the dough and shape it into a ball. Place the ball of dough into a large bowl (at least 3x the size of the dough) that has been greased. Cover the bowl with plastic wrap and let it sit in the warm oven (that was preheated to 200F and then turned off) for about 2 hours. The dough will have risen to 2x it's original size.
While the dough is rising, you can make your filling. Combine the light brown sugar, cinnamon, and salt together. Add the softened butter and mix to get a homogeneous paste. Set aside until you are ready to use it.
Once the dough is risen, turn it out onto a well-floured surface. Roll the dough into an 18" square. Spread the butter and cinnamon mixture evenly all over the dough leaving about 1/2" border around the edges. Roll the dough towards you in a very tight log. Pinch the seam of the log to make a seal. Cut the roll in 1/2, then 1/2 again and repeat until you have 12 equal pieces. Put each individual piece swirl-side up in the prepared baking pan. Cover this pan with plastic wrap and leave it on your stove to proof for another hour. The rolls will have doubled in size again.
Preheat your oven to 350F. Take the plastic wrap off and bake the rolls for about 35-40 minutes or until the tops are golden brown. While the rolls are in the oven, make the cream cheese frosting. Whisk all the frosting ingredients in a bowl and set aside.
Take the rolls out of the oven. At this point, you may cool them and freeze them if you want to have them at a later time. If not, spread a thin layer of frosting on them and let them cool for about half an hour. Then top with the remaining frosting, serve and enjoy! You may individually wrap and freeze the cinnamon rolls as well, after baking and icing them. They keep for up to 3 months.